
Correct sizing of vRealize Network Insight (vRNI) is not easy. While it’s easy to go with extra large “just to be safe” it might be better to start smaller and then scale up (more resources) and later out (cluster) when needed. Also keep in mind that vRNI requires 100% resource reservations for CPU and RAM, and a recommended IOPS of 7500.
This post is a walkthrough of how I did a vertical scale up from medium to large using vRealize Suite Lifecycle Manager (vRSLCM). It will not go into details of the planning of vRNI scaling. You will find some information in the VMware docs for that:
- System Recommendations and Requirements (vmware.com)
- Increase the Brick Size of your Setup (vmware.com) (manually within vCenter)
- Planning to Scale up your Deployment (vmware.com)
Preparations
In my environment I’ve got each vRealize product in it’s own vRSLCM environment to keep things simple and neat. The entire vRealize solution is part of a VMware Cloud Foundation (v4.2.x)
Before we scale up we should create a snapshot of the vRNI environment, just in case. Remember to remove this afterwards (the scale up task also creates a temporary snapshot during the scale up process as well, for automated rollback in case the task fails).
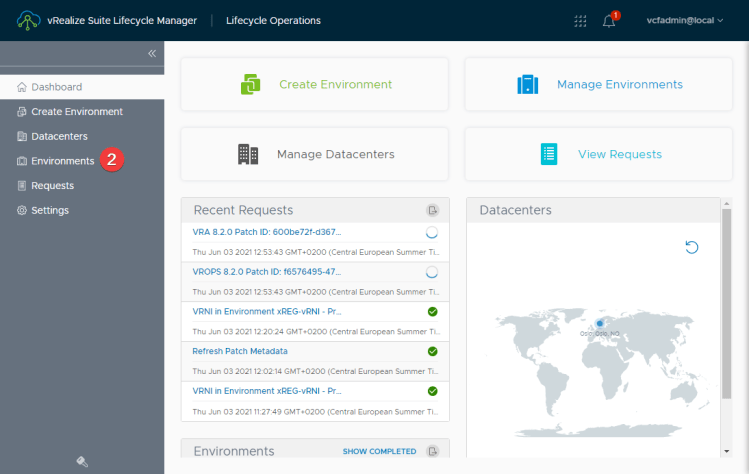
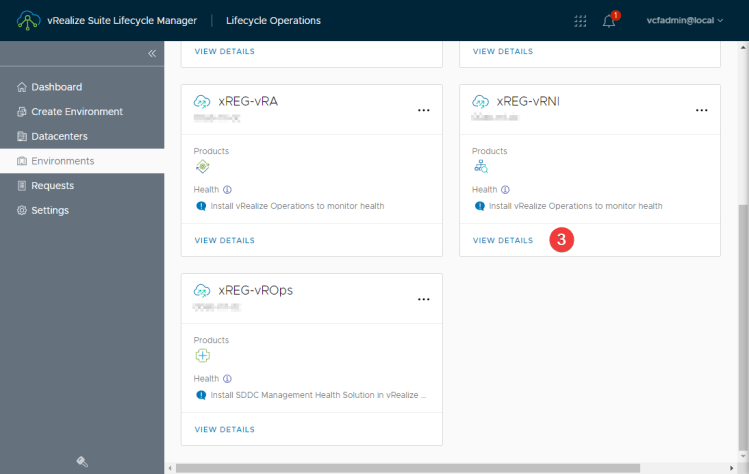
Log into vRSLCM. Click on Lifecycle Operations (1), Environments (2) in the menu to the left, and then View Details (3) for the vRNI environment.

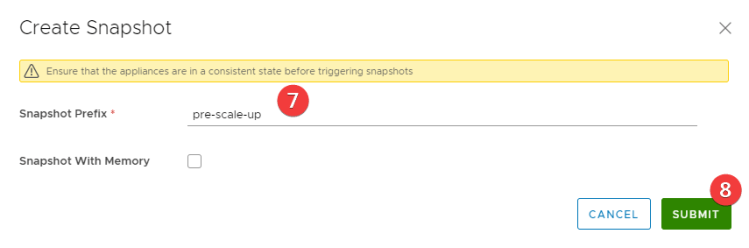
Wait for the environment page to load, and then click on the tree dots (4) to bring up the menu. Make a snapshot by clicking on Snapshot (5) > Create Snapshot (6). Give the snapshot a (prefix) name (7), and hit submit. This will initiate a task that takes a snapshot of all vRNI VMs (platform/collector).
Wait for the snapshots to finish and you should be ready for scaling up vRNI vertically.
Vertical Scale Up of vRNI
After the snapshot has been taken (you can verify in vCenter), go back into the vRNI Environment (Lifecycle operations > Environments > vRNI Env > view details).

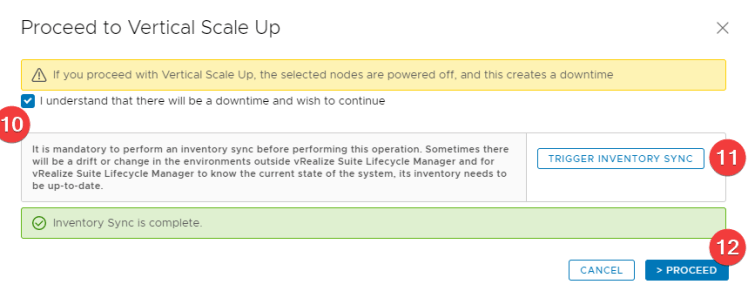
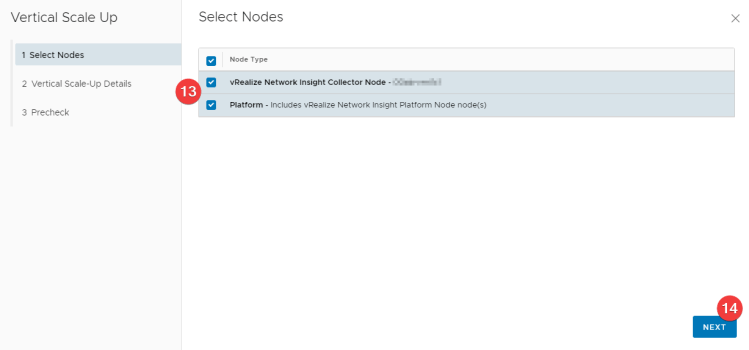
In the vRNI environtment, click on the three dots (8) again, and then Vertical Scale Up (9). A new window will appear. Verify (click) “I understand that there will be a downtime and wish to continue” (10) and trigger an inventory sync (11). When the sync is complete, click > Proceed (12). Next step is to select which nodes (13) you want to scale up. In my case we needed to scale up both the platform node and the collector. Click Next (14).
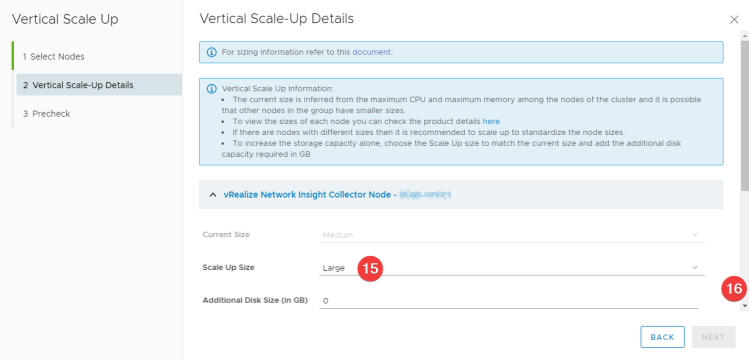


My vRNI nodes (one platform and one collector node) were all medium size. I needed to change the Collector to Large (15) to have enough resources to collect and analyze data from all the devices in the environment. There is no need for more diskspace according to VMware docs, so I leave it at 0 (zero). Scroll down (16) to the platform node. You can also minimize the collector section by clicking on the up-arrow next to the product name (where I’ve blurred out the hostname of my collector). Change the Platform node to large (17) as well. The Advanced settings isn’t something you need to change. It gives you the option to select (a different) datastore for your additional disk option, which I’m not doing. It’s all vSAN anyway, so no other valid datastores to choose from in this environment. If you’re happy with large click Next (18).
A quick note about vRNI sizes: The node size has to be Large before you can scale out (cluster of 3 nodes).
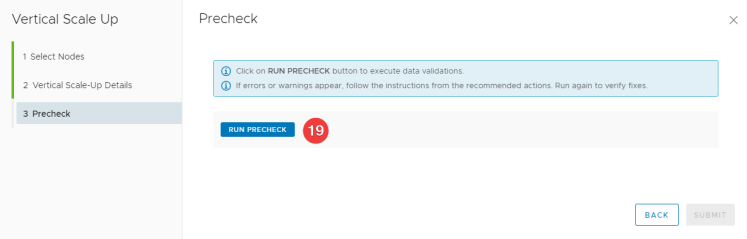
Before the vertical scale up can be performed, a pre-check must be done. Click on Pre-check (19) and wait for it to finish successfully. Save the pre-check report if you like. Click Submit (20).
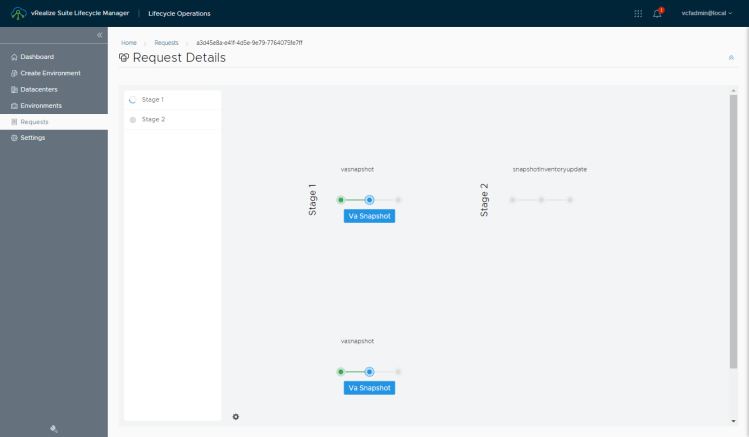
Vertical Scale Up Request Task
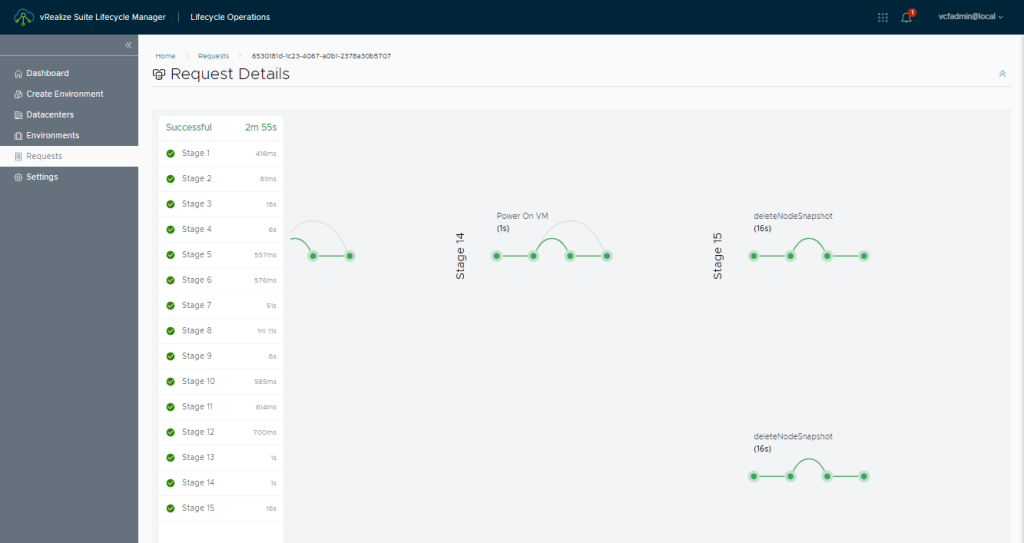
The Vertical Scale Up request contains 15 steps. You can follow them in the vRSLCM Request Details. Here is the start and finish:

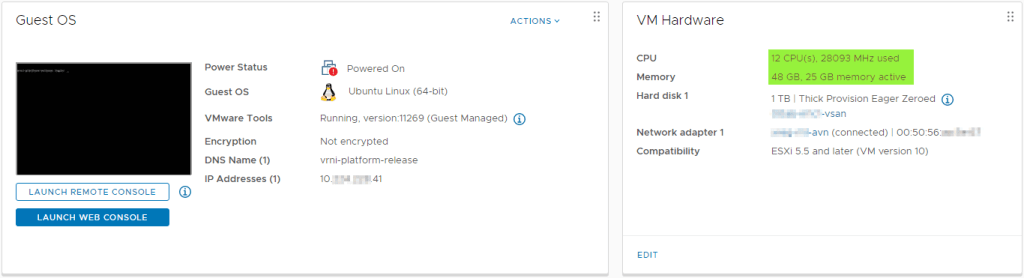
Checking the VMs in the vCenter, you should notice the CPU & Memory having changed – here is a screenshot of the platform node. It has changed from 8vCPU/32GB to 12vCPU/48GB.
vRNI Platform Reconfigure
After the vRNI nodes are back up running with the new brick size (of Large in my environment), you need to tell vRNI that it needs to reconfigure for the new resources. Navigate to Overview and Updates (Cog Wheel > Settings > Infrastructure and Support > Overview and Updates). There you should see a Reconfigure button next to the Platform Capacity section:

The “2 Problems” in red in the screenshot above is clickable, and it would alert me about:
- Capacity configuration is mismatched.
- System usage has breached the capacity.
In my case, the solution to both problems is to click on the Reconfigure button. Also documented at VMware Docs.
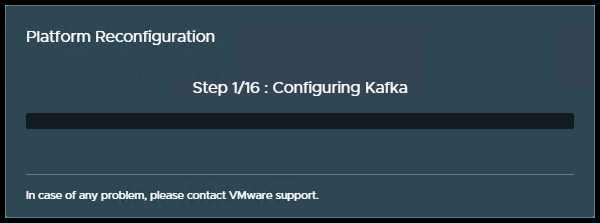
‘When you click the Reconfigure button you will be informed vRNI could be unavailable for 10 minutes. In my case it was just a couple of minutes. Hitting OK, will start the reconfigure process of 16 steps.
When the reconfigure process is done you should hopefully see a Good health and have enough resources. If not, you might have to scale up to Extra Large, or scale out to a tree node cluster. For now it’s good for my environement:

And “just like that”, I have a scaled up the vRNI environment, mostly automated and handled by vRSLCM with a few clicks (and a reconfigure button).
